
Changing Your Email Password Through Your Hosting Account Client Area
Let's keep your email account accessible and secure!
This guide will walk you through the simple steps of changing the password for your existing email account within your Hosting Account Client Area.
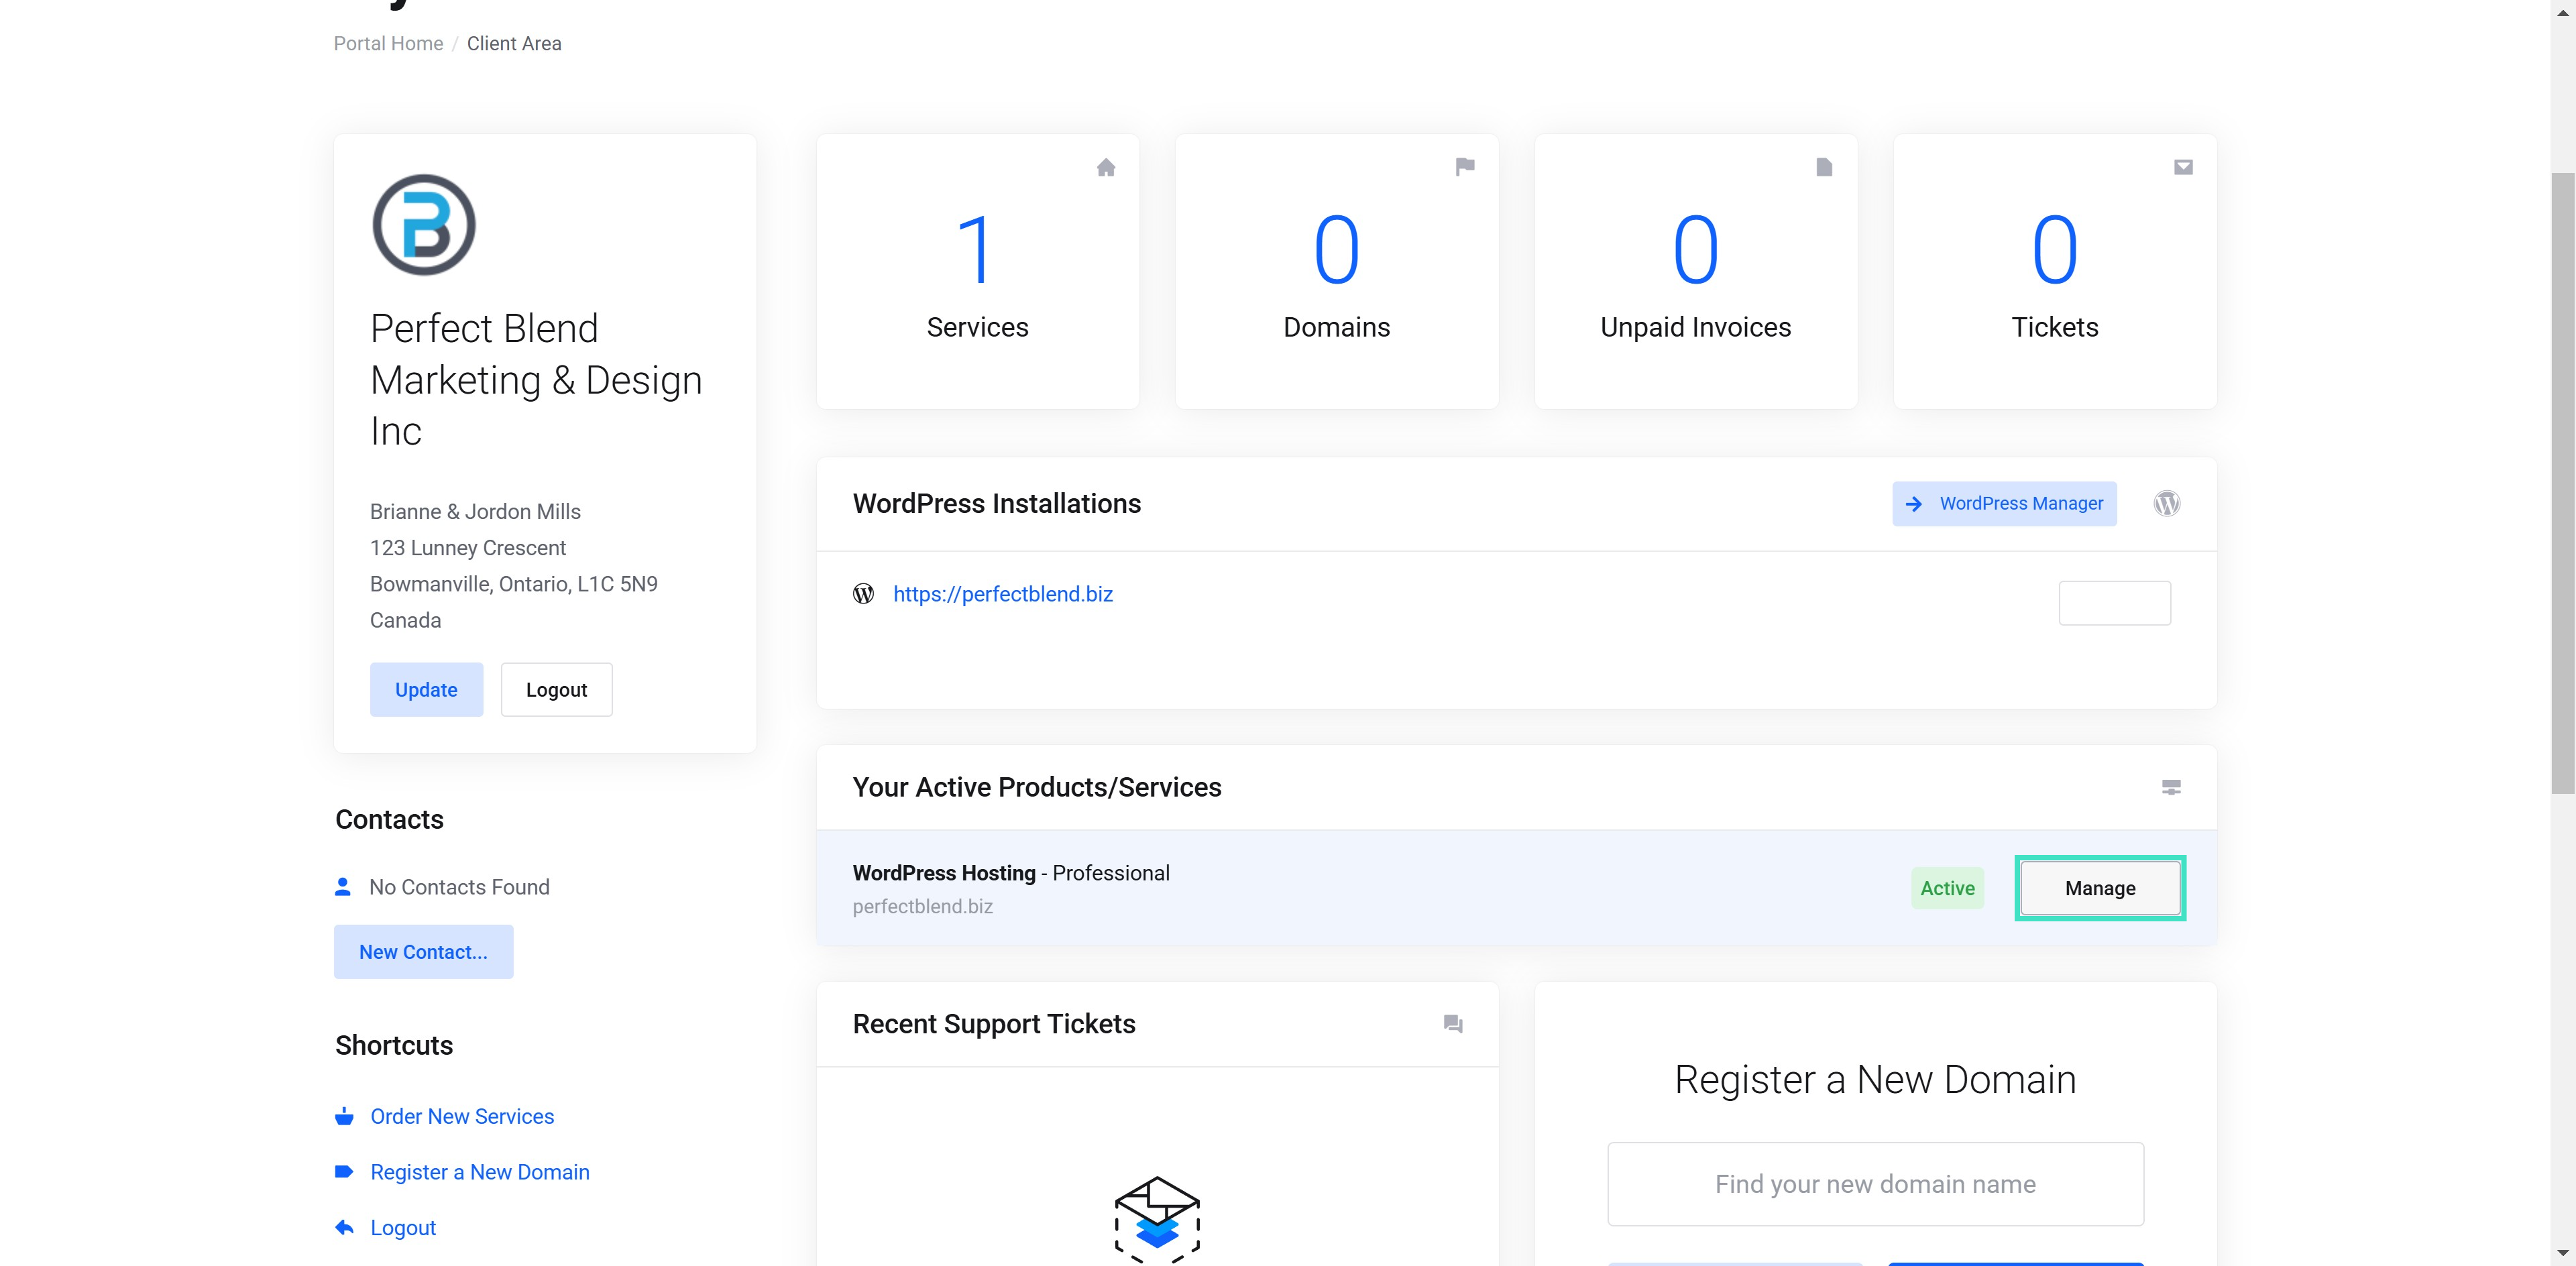
Step 1: Locate Your Hosting Account
- On your Perfect Blend Client Area dashboard, find the "Manage" button located next to your WordPress Hosting account.
- Click the "Manage" button to access the account management page.
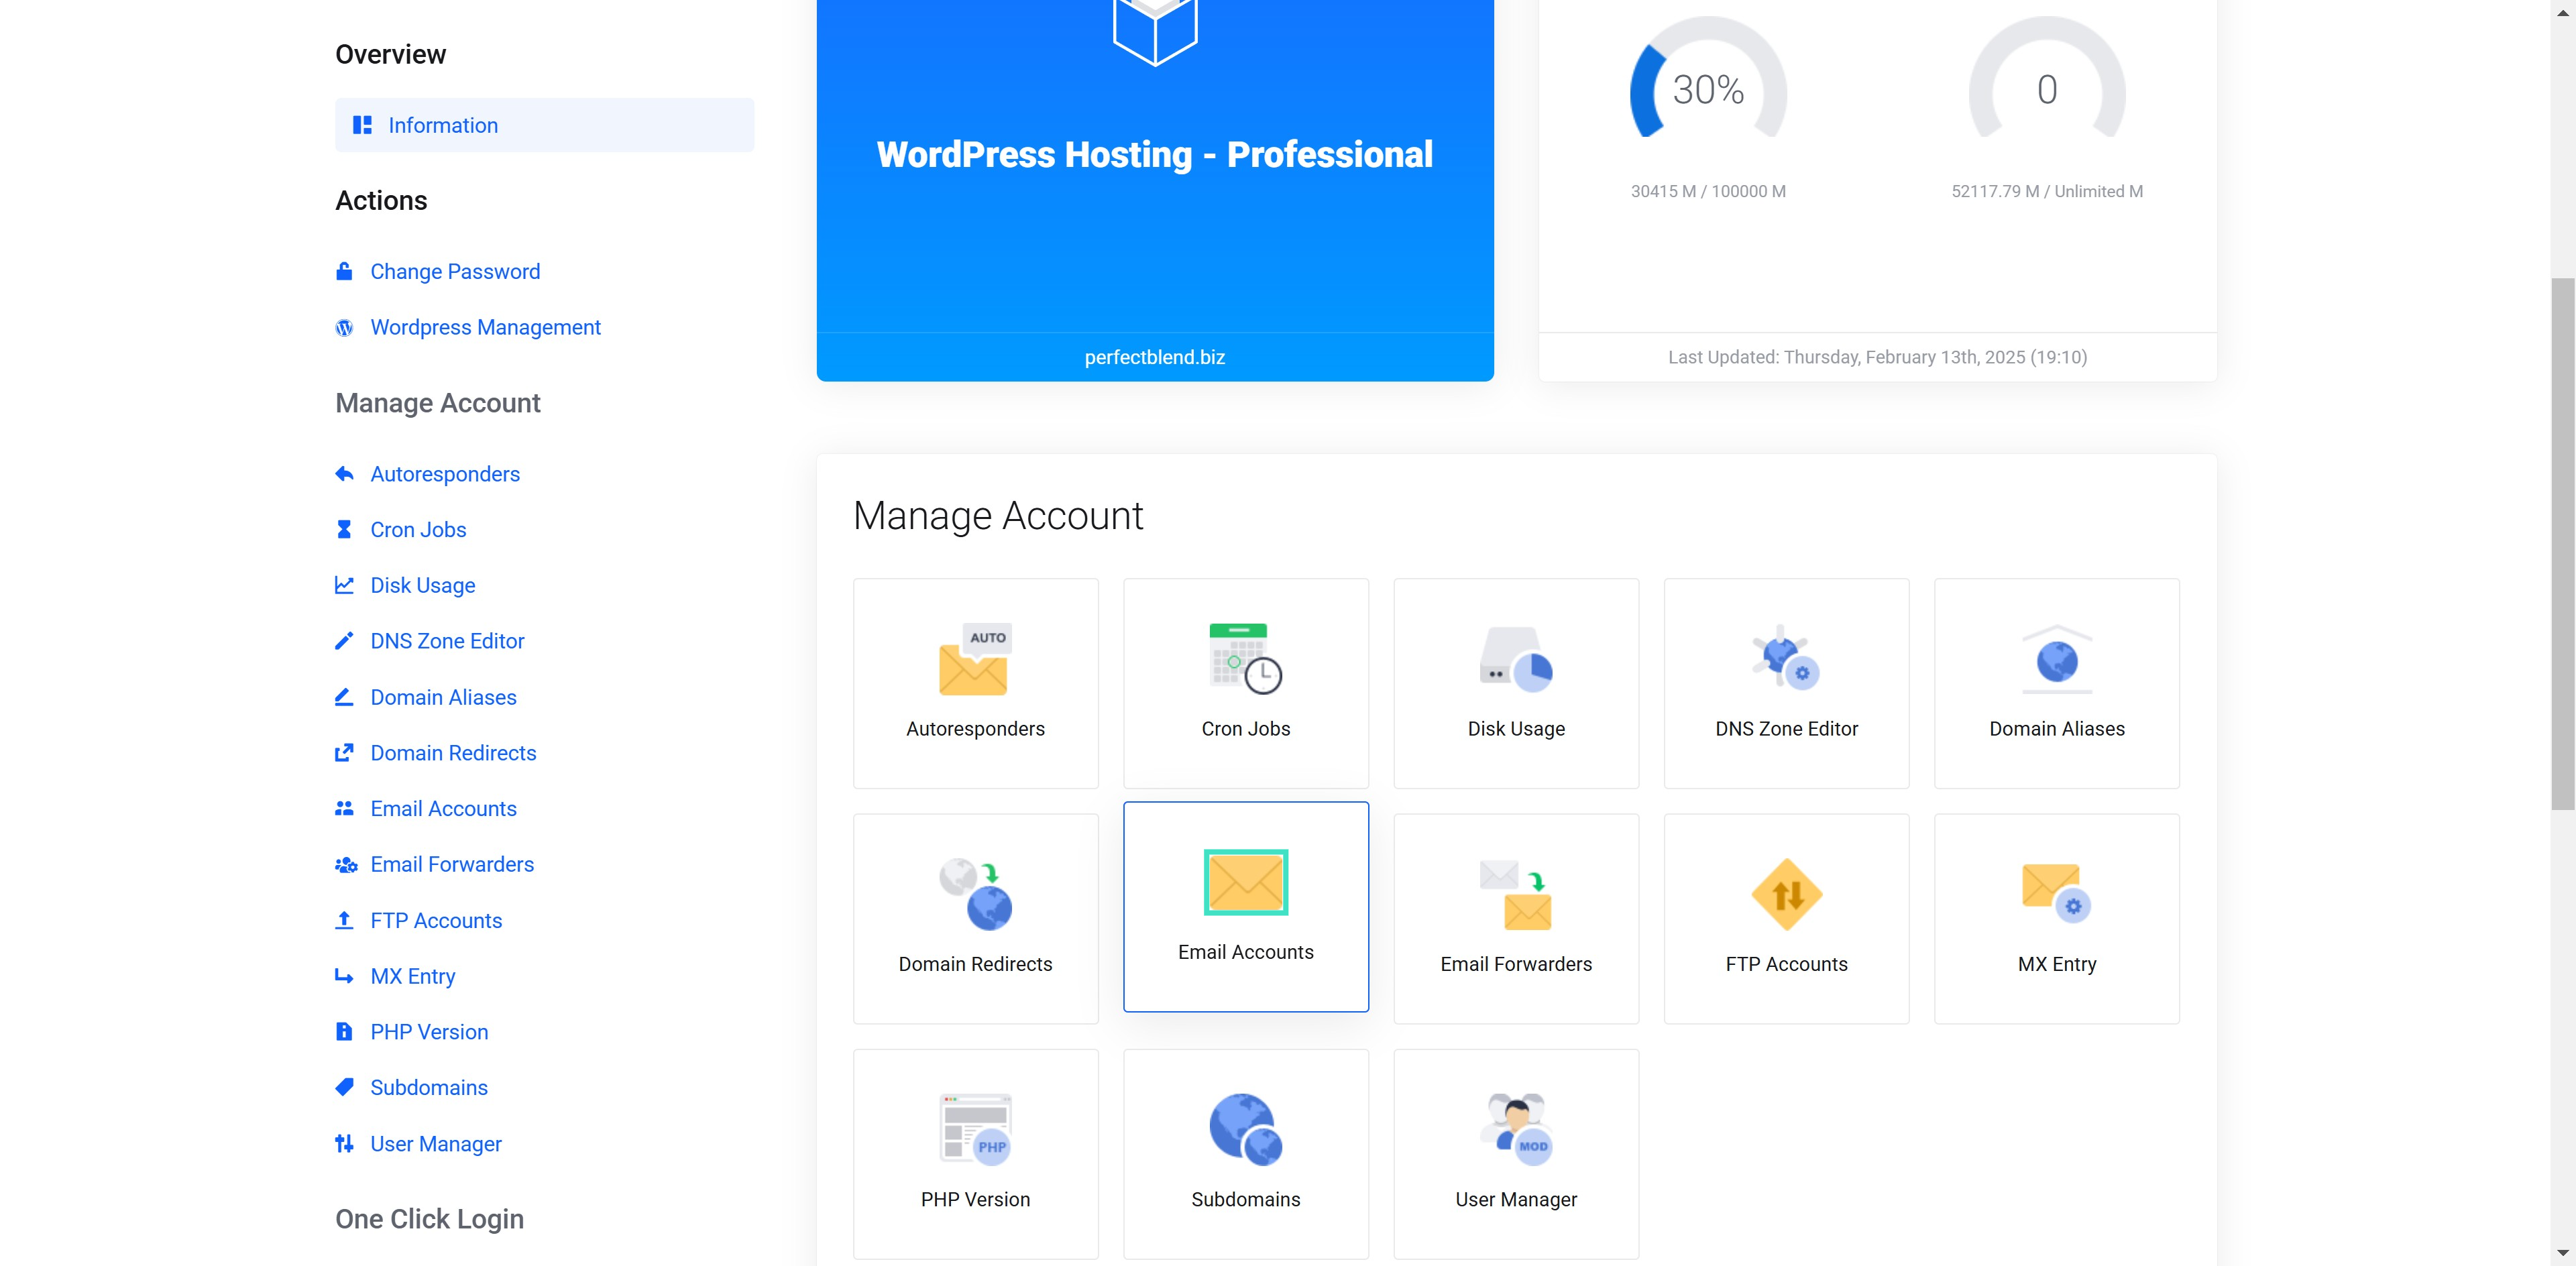
Step 2: Access Email Account Management
- On the account management page, you'll see a list of options.
- Click on "Email Accounts."
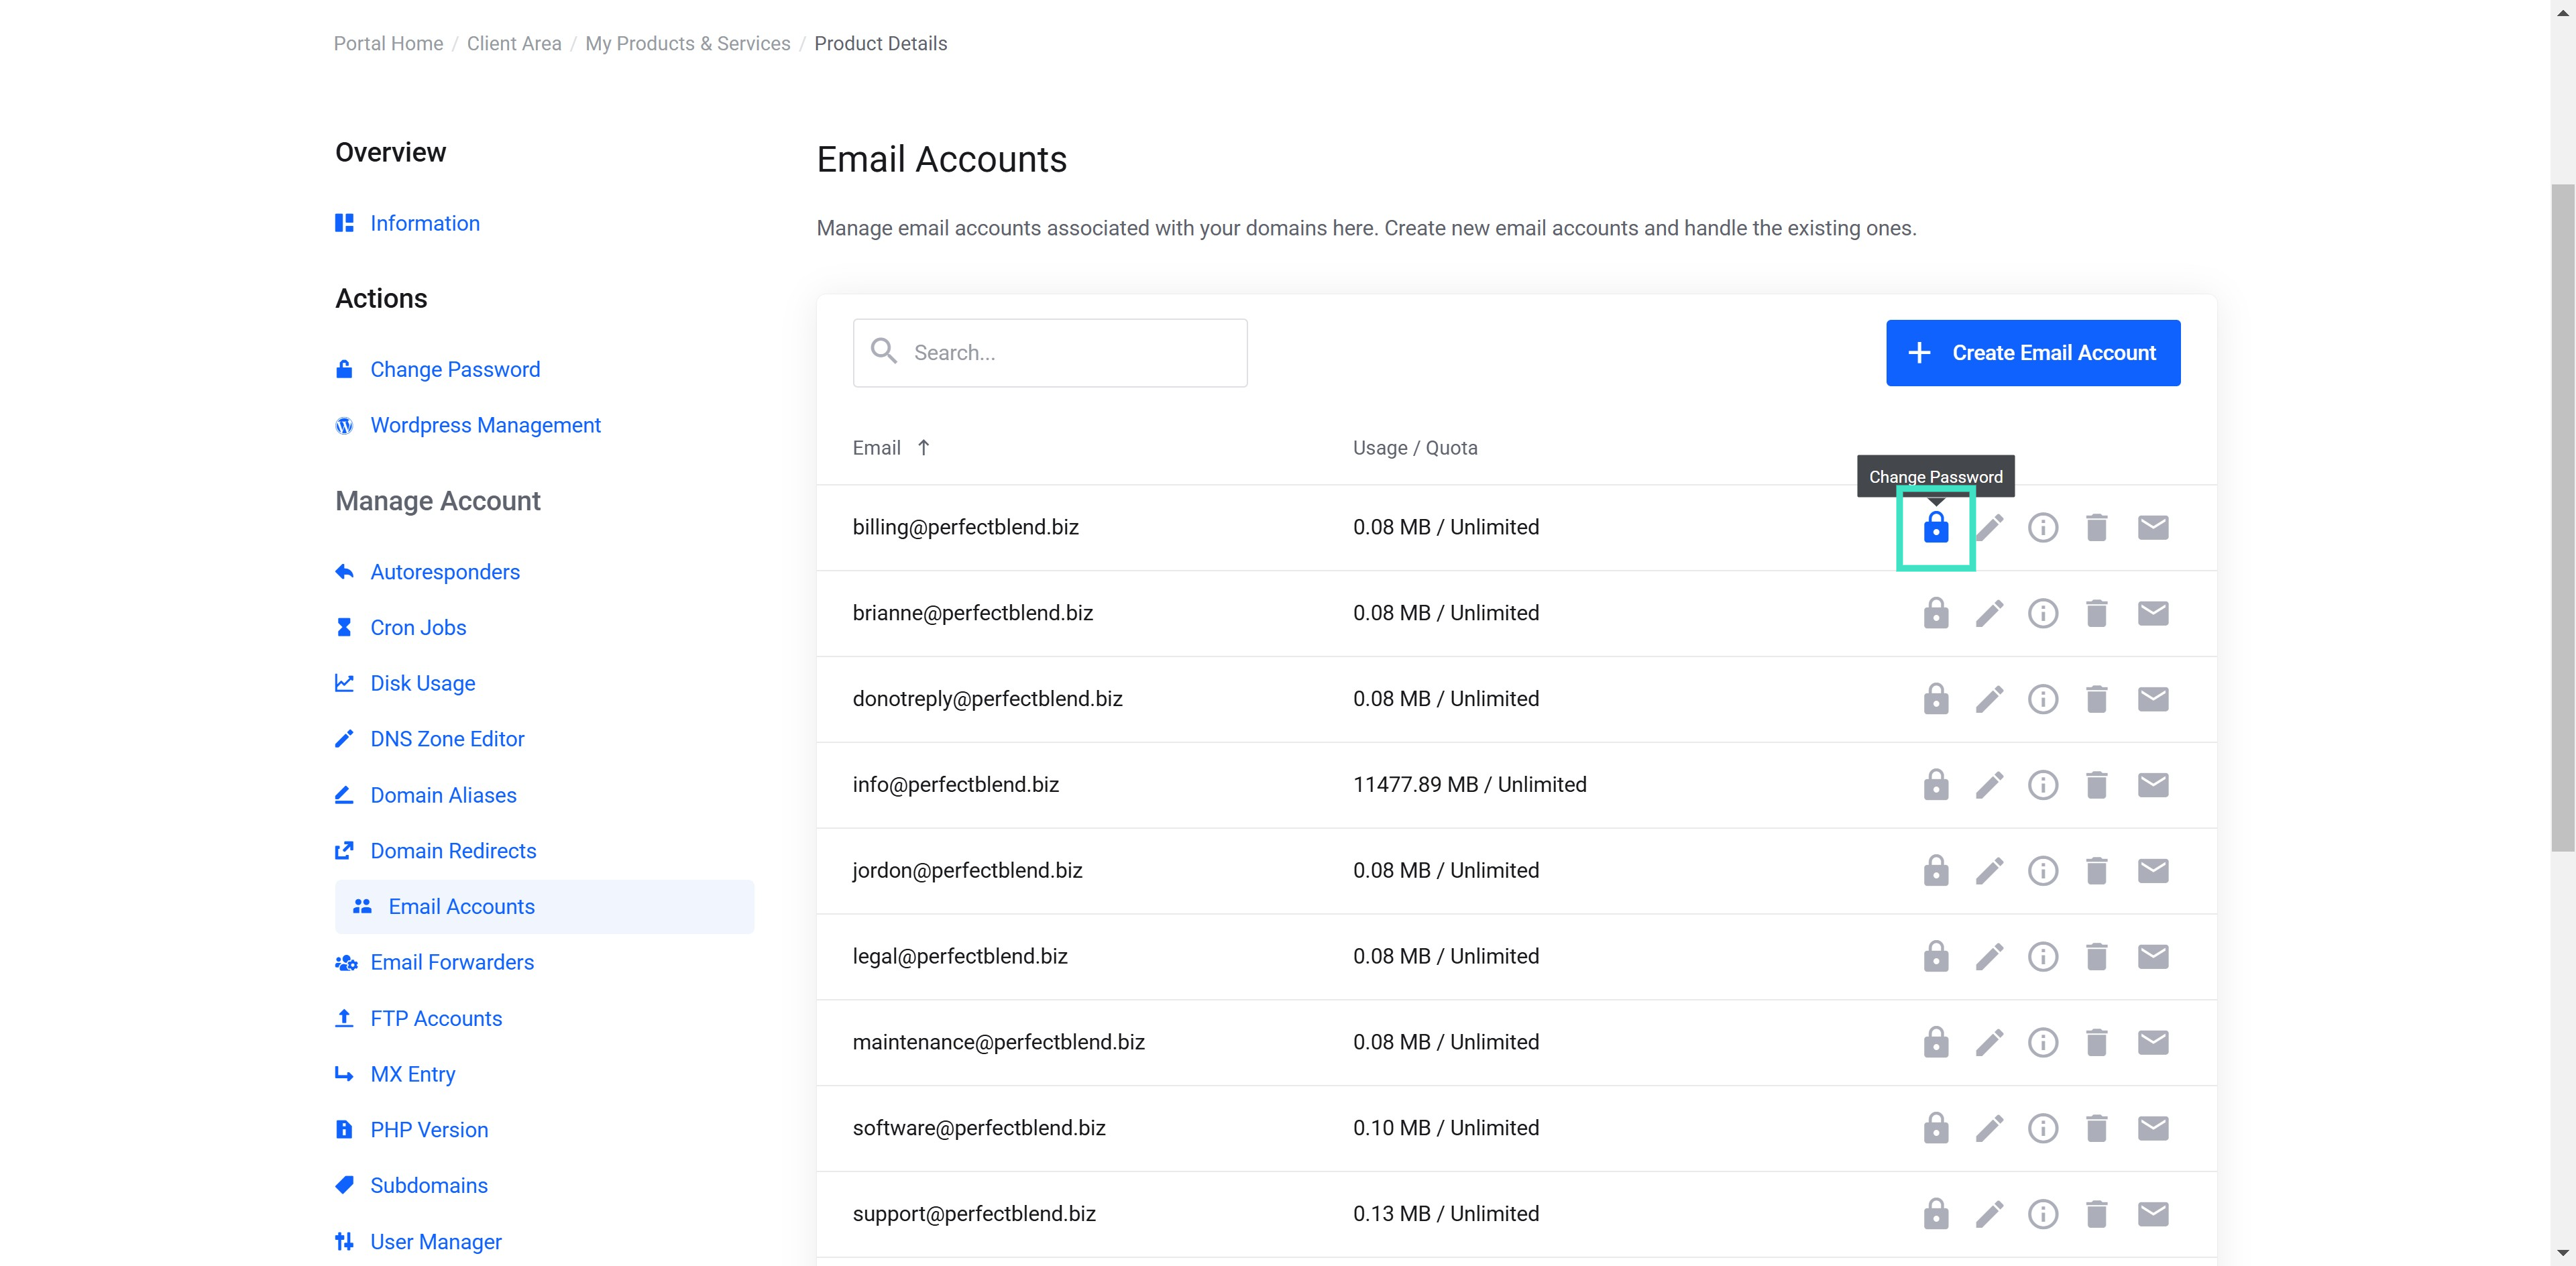
Step 3: Initiate Password Change
- On the "Email Accounts" page, you'll see a list of your existing email accounts.
- Locate the specific email account you want to change the password for.
- Click on the "Lock" icon next to the email address. This icon usually represents the "Change Password" function.
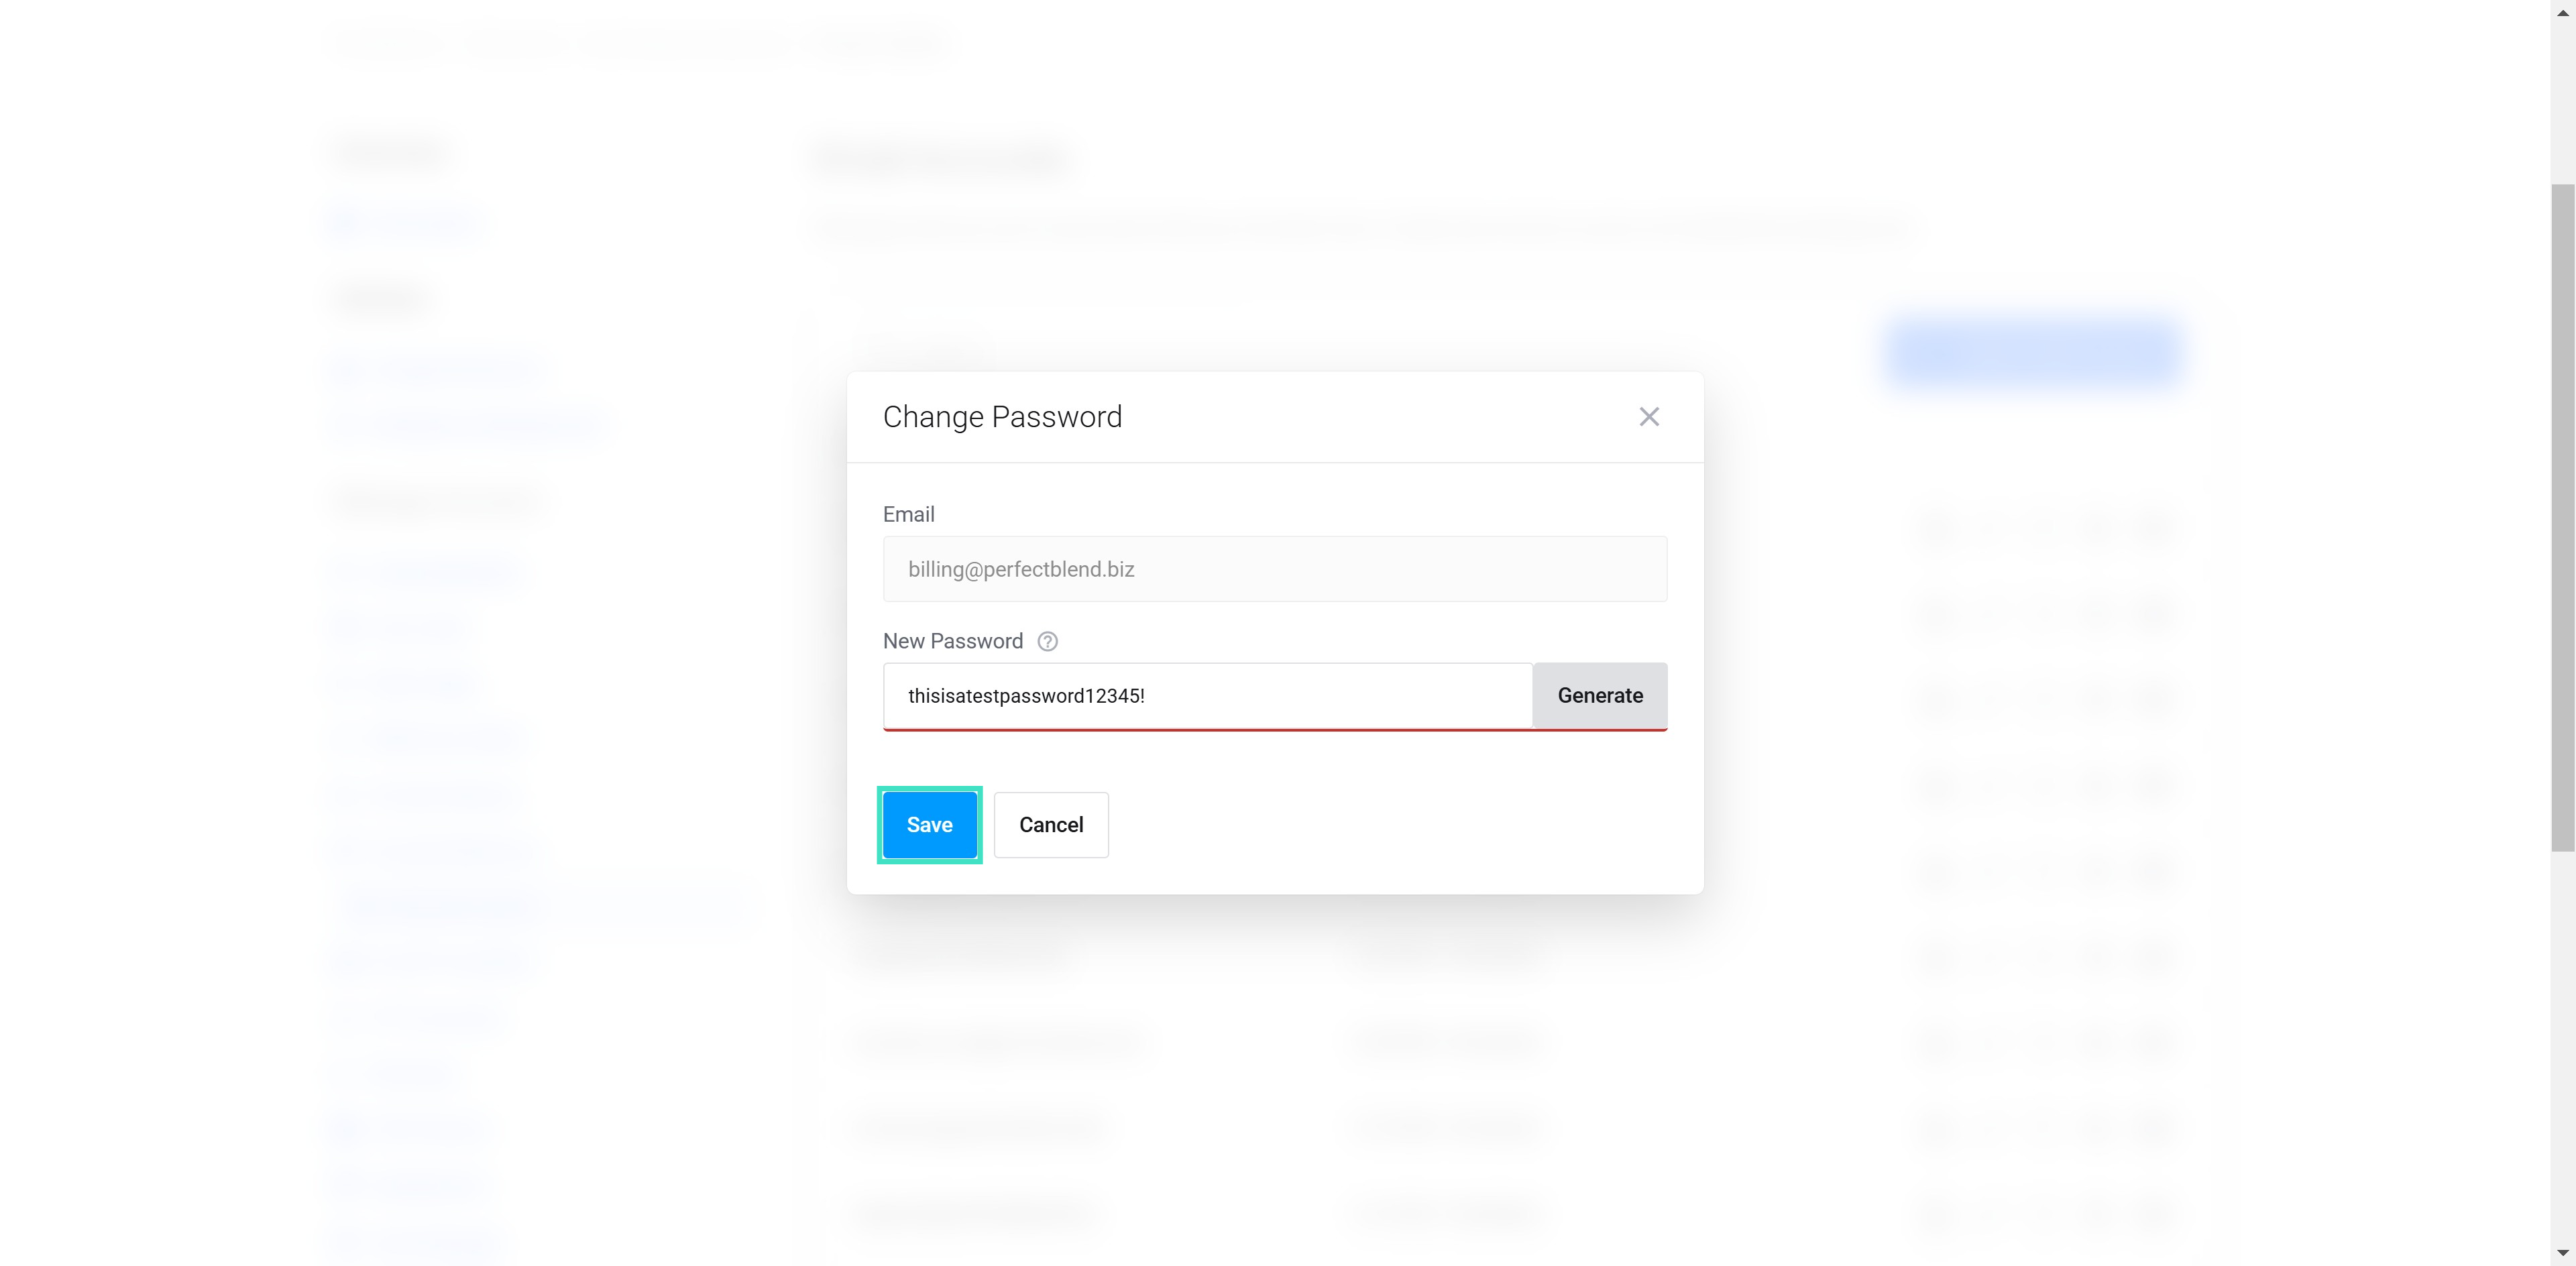
Step 4: Enter Your New Password
- In the provided field, enter your new password.
- For the best security, choose a strong password that includes a combination of uppercase and lowercase letters, numbers, and symbols.
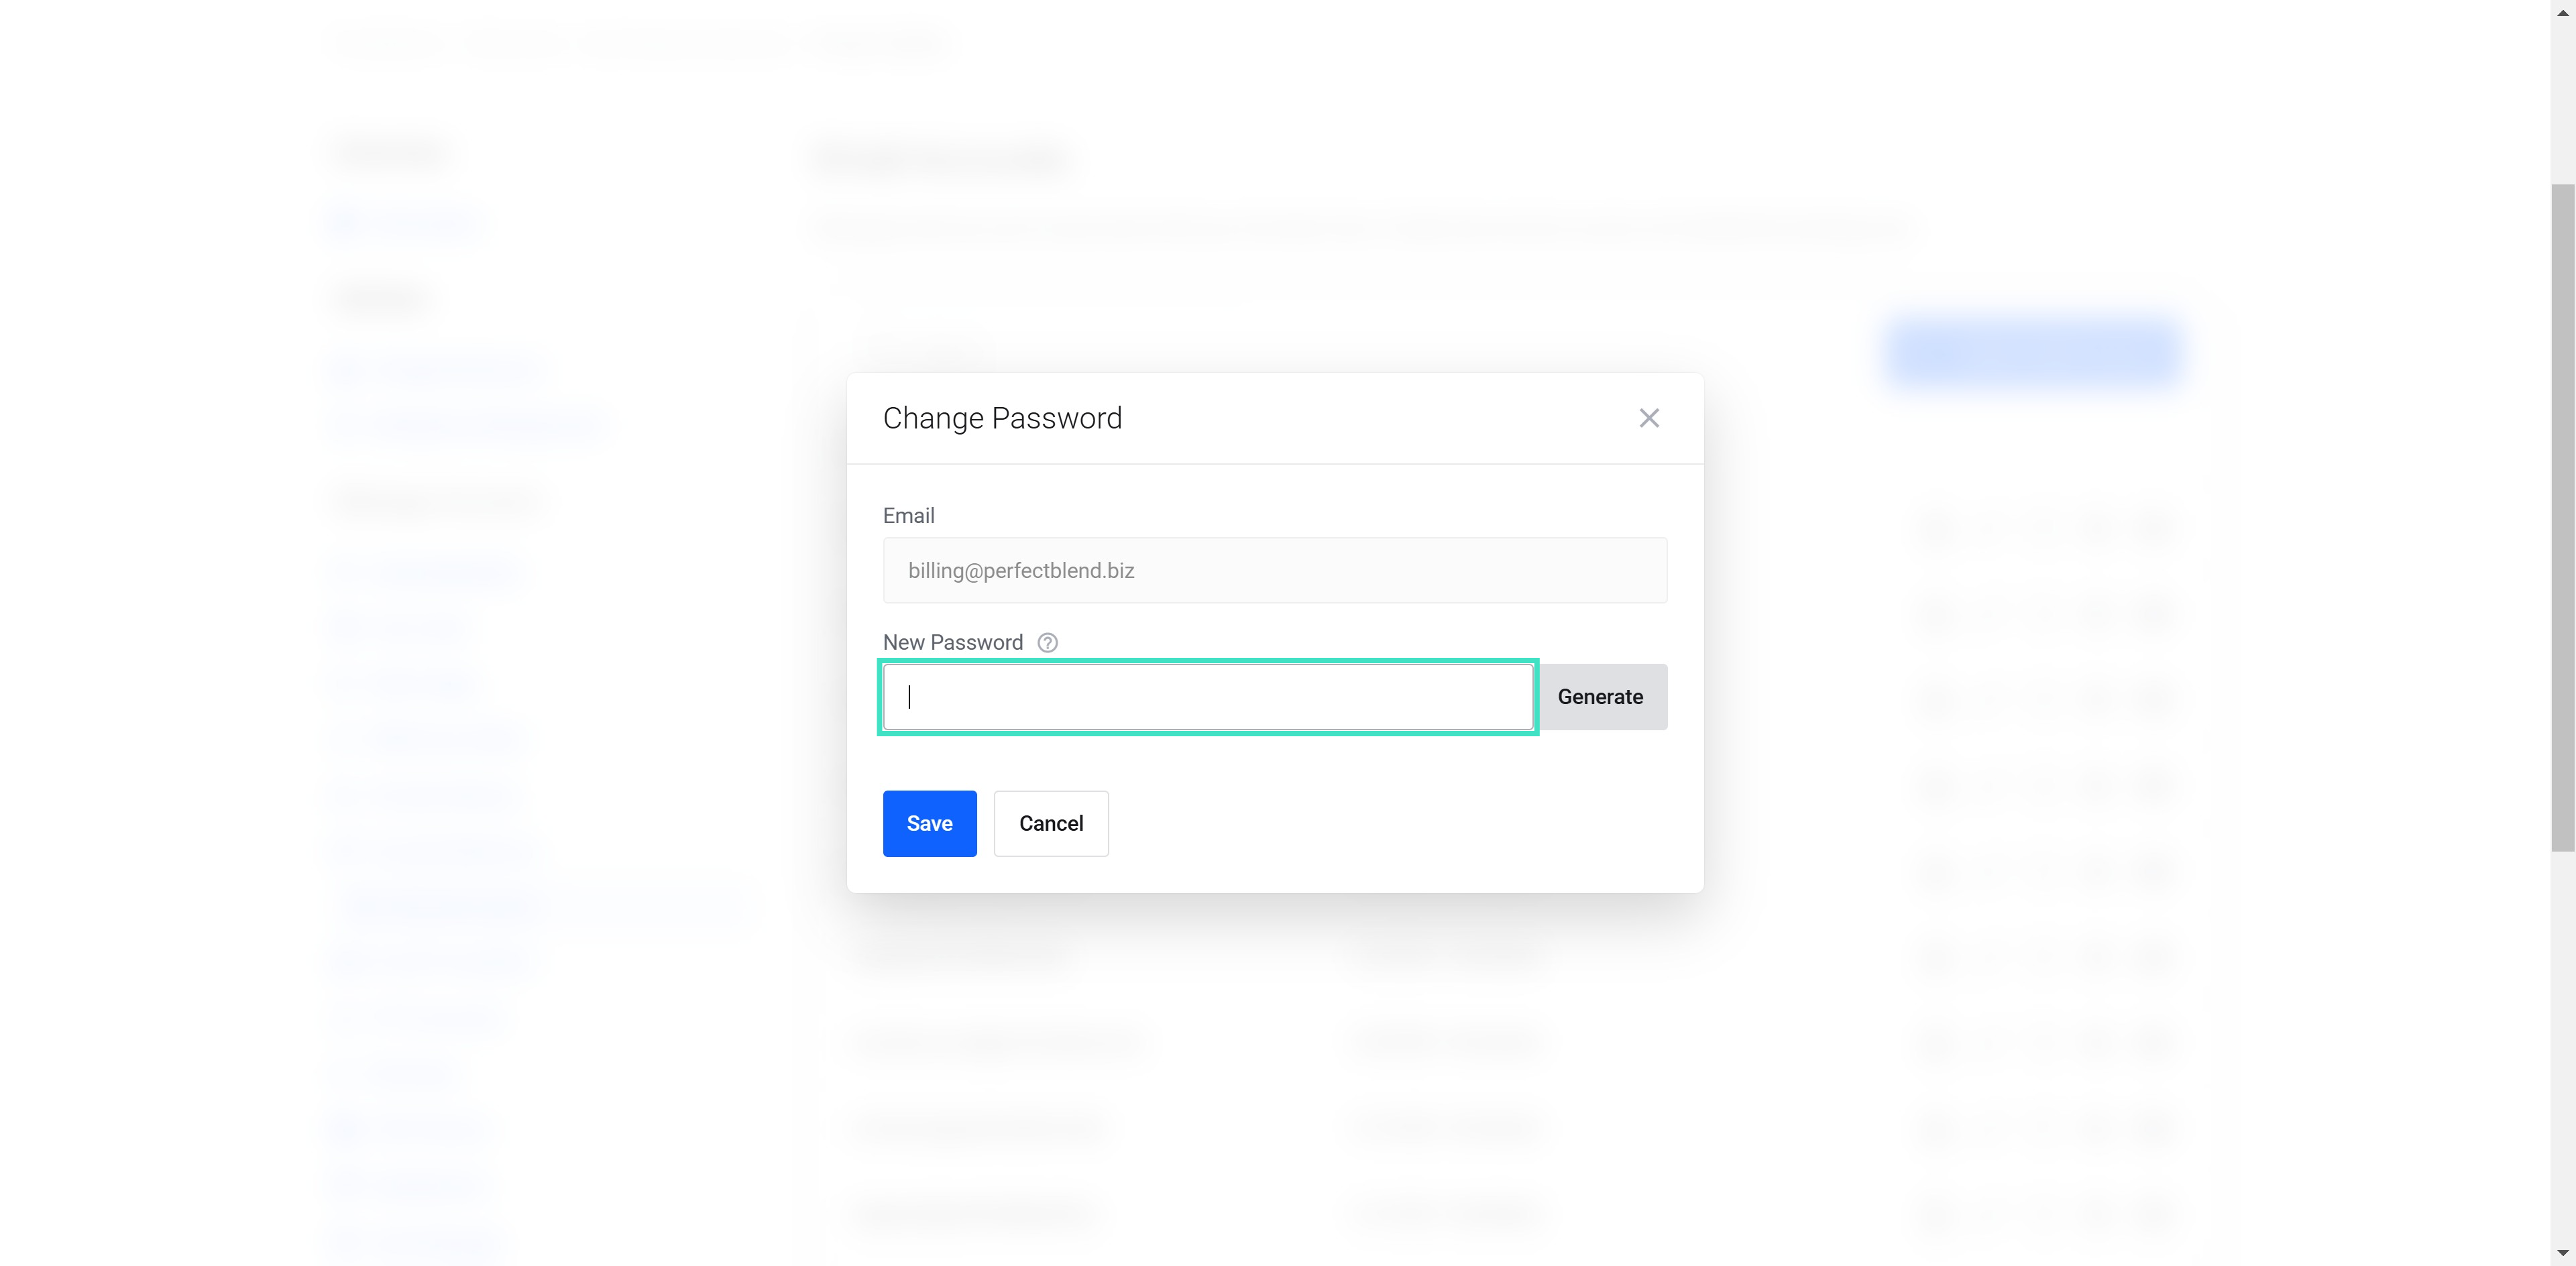
Step 5: Save Your Changes
- Once you've entered your new password, click the "Save" button.
Congratulations! You've successfully changed the password for your email account.
Important Note: Remember this new password! You'll need it to access your email from your email client (like Outlook or Gmail) or through a webmail interface.
Need Assistance?
If you encounter any problems or have questions during the process, please don't hesitate to contact our support team. We're always here to help!
